

LED pixel strips are strips which have small LED modules mounted on it. One of these LED modules is the WS2812B which features a cascading port transmission mechanism which needs only a single line.
This means that multiple WS2812B can be cascaded and individually controlled by a single connection for data transmission. Therefore, cascading many WS2812B modules requires only wiring for VCC, GND, and the data transmission. As a result, the WS2812B modules are well suited for LED pixel strips. Today, WS2812B-based LED pixel strips are available in all kinds of variants. Typically, strips can be bought with 30 to 144 WS2812B modules per meter. When having 144 modules per meter, there is almost no space left between the modules. In this tutorial it is shown how to program an Arduino in order to control a WS2812B-based LED strip with the FastLED library. FastLED is a library that allows to control all kinds of LED strips (WS2810, WS2811, LPD8806, Neopixel etc.).
List of materials:
Pin layout:
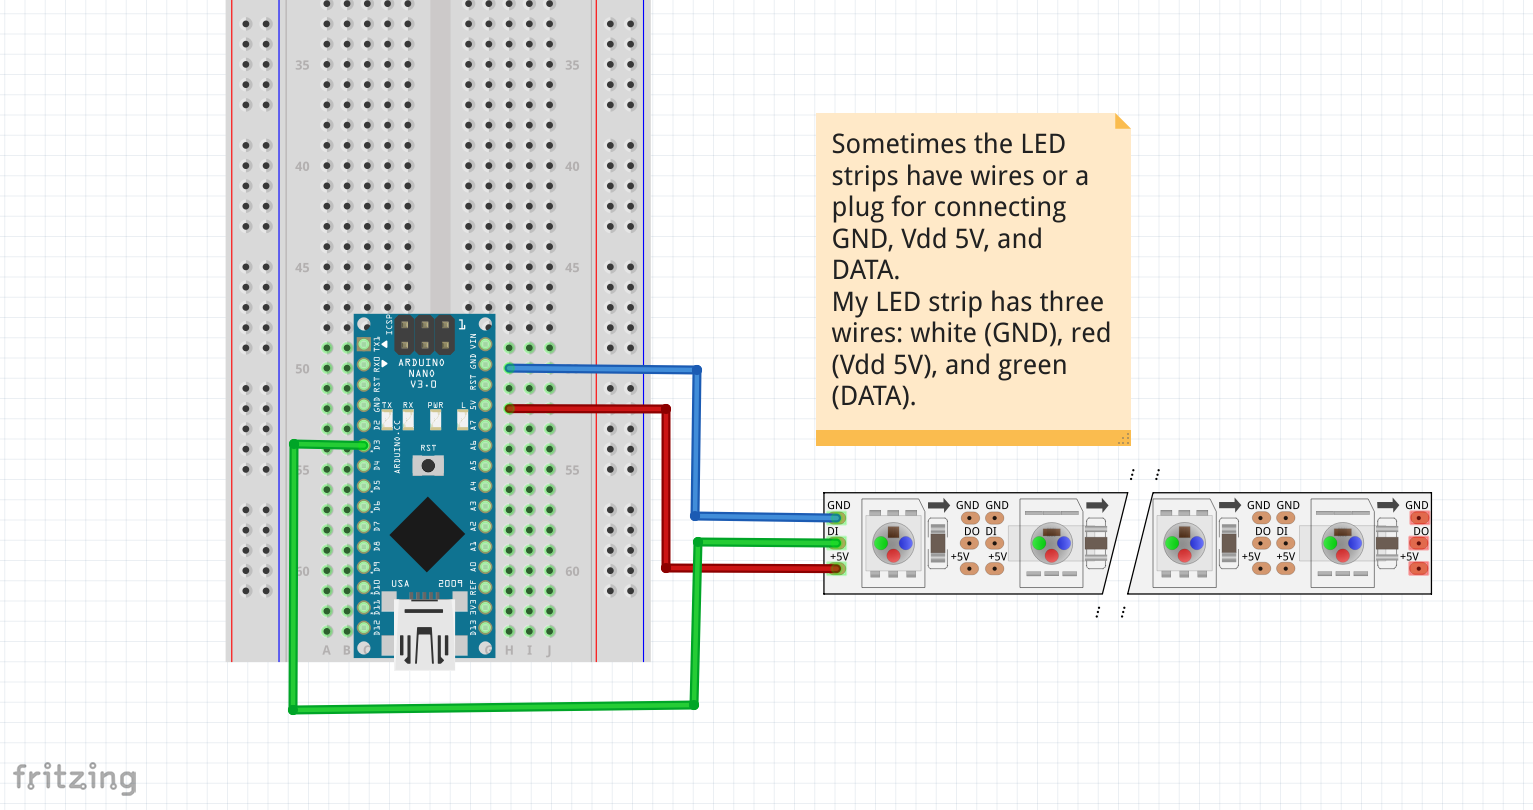
Wiring up a basic setup is very easy, as the LED pixel strip has only three input pins which must be connected. Typically, these input pins represent GND, Vdd 5V, and a data connection. My LED pixel strip has three wires: white (GND), red (Vdd), and green (data). The color of the inputs might differ among manufacturers. Therefore, have a look at the description or datasheet of the LED pixel strip that you bought.
An Arduino can provide enough power to an LED strip with thirty WS2812B modules. For this reason, we can connect the GND pin and the 5V pin directly to the white and red wire, correspondingly. According to some forum entries, you get about 400mA from the Arduino’s 5V pin. Last but not least, we connect the data pin (green wire) to the Arduino’s pin 3. Basically, you can use any pin that supports PWM signals.
Example source code:
As mentioned before, the program utilizes the FastLED library to control the LED strip. At the beginning, the FastLED header file is included. In the setup function, the LED strip representation is initialized. As the FastLED supports many more LED strips (different LED modules, different lengths, etc.), the initialization needs the LED module type, Arduino pin number used for data transfer, color order, reference to an array representing the LEDs, and the number of LEDs. Optionally, a color correction can be set in order to improve the fidelity of the colors.
Next, there is a function which switches off all pixels (“showProgramCleanUp”). This function becomes very useful to “reset” the LED strip.
The example source code contains three different “light programs”. Each light program is implemented as a function. The first program switches on all LEDs in randomly selected colors (“showProgramRandom”). The next program shows a single-colored pixel being shifted from the beginning of the LED strip to the end (“showProgramShiftSinglePixel”). The last program shows how multiple pixel are shifted from the beginning to the end (“showProgramShiftMultiPixel”). In this light program, each pixel has a randomly selected color.
In the loop function, each light program is called twice with different parameters. Before a function call to a light program is made, all pixels of the LED strip are switched off by calling the special program “showProgramCleanUp”.
// (c) Michael Schoeffler 2017, http://www.mschoeffler.de
#include "FastLED.h"
#define DATA_PIN 3
#define LED_TYPE WS2812B
#define COLOR_ORDER GRB
#define NUM_LEDS 30
#define BRIGHTNESS 96
CRGB leds[NUM_LEDS];
void setup() {
delay(3000); // initial delay of a few seconds is recommended
FastLED.addLeds<LED_TYPE,DATA_PIN,COLOR_ORDER>(leds, NUM_LEDS).setCorrection(TypicalLEDStrip); // initializes LED strip
FastLED.setBrightness(BRIGHTNESS);// global brightness
}
// switches off all LEDs
void showProgramCleanUp(long delayTime) {
for (int i = 0; i < NUM_LEDS; ++i) {
leds[i] = CRGB::Black;
}
FastLED.show();
delay(delayTime);
}
// switches on all LEDs. Each LED is shown in random color.
// numIterations: indicates how often LEDs are switched on in random colors
// delayTime: indicates for how long LEDs are switched on.
void showProgramRandom(int numIterations, long delayTime) {
for (int iteration = 0; iteration < numIterations; ++iteration) {
for (int i = 0; i < NUM_LEDS; ++i) {
leds[i] = CHSV(random8(),255,255); // hue, saturation, value
}
FastLED.show();
delay(delayTime);
}
}
// Shifts a single pixel from the start of strip to the end.
// crgb: color of shifted pixel
// delayTime: indicates how long the pixel is shown on each LED
void showProgramShiftSinglePixel(CRGB crgb, long delayTime) {
for (int i = 0; i < NUM_LEDS; ++i) {
leds[i] = crgb;
FastLED.show();
delay(delayTime);
leds[i] = CRGB::Black;
}
}
// Shifts multiple pixel from the start of strip to the end. The color of each pixel is randomized.
// delayTime: indicates how long the pixels are shown on each LED
void showProgramShiftMultiPixel(long delayTime) {
for (int i = 0; i < NUM_LEDS; ++i) {
for (int j = i; j > 0; --j) {
leds[j] = leds[j-1];
}
CRGB newPixel = CHSV(random8(), 255, 255);
leds[0] = newPixel;
FastLED.show();
delay(delayTime);
}
}
// main program
void loop() {
showProgramCleanUp(2500); // clean up
showProgramRandom(100, 100); // show "random" program
showProgramCleanUp(2500); // clean up
showProgramRandom(10, 1000); // show "random" program
showProgramCleanUp(2500); // clean up
showProgramShiftSinglePixel(CRGB::Blue, 250); // show "shift single pixel program" with blue pixel
showProgramCleanUp(2500); // clean up
showProgramShiftSinglePixel(CRGB::Maroon, 100); // show "shift single pixel program" with maroon pixel
showProgramCleanUp(2500); // clean up
showProgramShiftMultiPixel(500); // show "shift multi pixel" program
showProgramCleanUp(2500); // clean up
showProgramShiftMultiPixel(50); // show "shift multi pixel" program
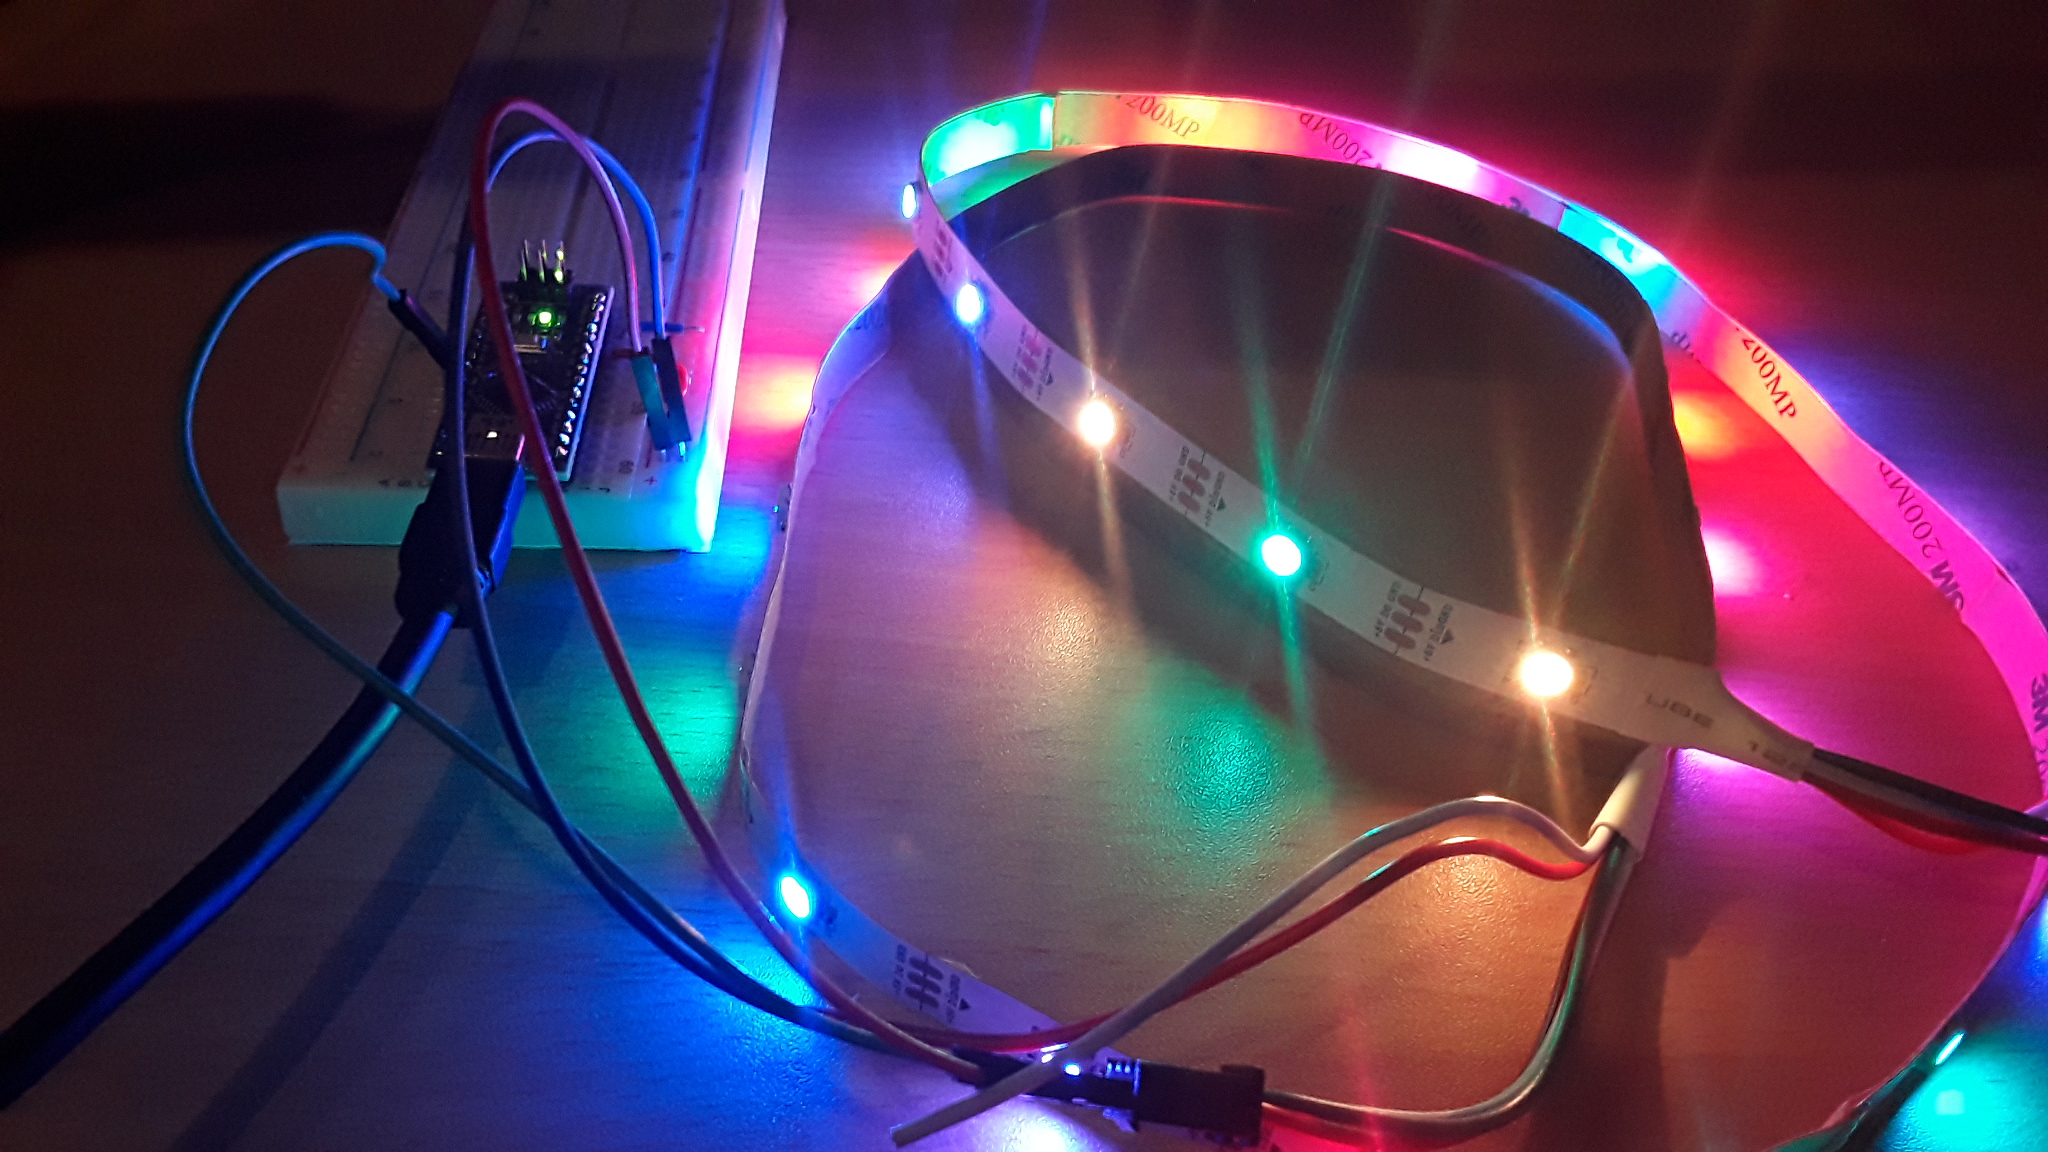
}When the source code is compiled and transferred to the Arduino, the LED strip should show colored pixels according the active light program.
Video Tutorial
hello, i have this error on the FastLED.addLeds… : “no matching function for call to ‘CFastLED::addLeds(CRGB&, int)'” do you see this error before ?
Klein ist die Welt :-)
Habe nach WS2812b Arduino Nano Fastled gegoogelt, nächstes mal frage ich dich direkt ;-)
Hier riechts gerade nach verbrannter Elektronik, 80 LEDs in full-bright hält der Nano anscheinend nicht aus..
Viele Grüße
Daniel
Michael … Nice article and clean code. I got a half meter, 30 leds, WS2812B. I’m using Arduino nano, pin 3 for data, separate power supply 5V for the LED strip. Code compiles but no activity on the LED strip. Hence, my question, how can I troubleshoot this?
The strip gets 5V — checked with multimeter
Nano works, if I upload the blink code, it works
Library FastLED 3.2.1 is installed.
[…] variant: Two RGB LED RingsSome time ago, I made a tutorial about WS2812B-based LED strips. Multiple times, I was asked how to apply the program when having two LED strips. If you make use […]
Hello Michael,
Greetings from South Africa.
I trust you are well?
Thanks for your demo program, it is the best I have seen sofar.
And believe me I have been looking and was busy with WS2812B since “Lockdown” began in South Africa.
Just before Lockdown I bought an Arduino and some ws2812 leds.
Currently i got an arrangement of 10 strips of 30 leds in a circile. All connected to the same data pin.
Arduino is completly new to me and i do battle with the code.
Though your code is the easiest to follow sofar.
I would like to create a display simular to this:
https://www.youtube.com/watch?v=6OhCRSRM9V4 (6min 15sec long)
In the Fastled Library there is about 9 codes which works on my system, and i would like to ‘merge; them.
I think your example might show me how to do that?
If I don’t succeed, would you be willing to help me?
I know it will take some time and effort from you so I don’t expect it for free?
Best Regards
Hendrik
[…] already made a tutorial on how to use WS2812B-based LED strips. With the knowledge you gain by this tutorial, it should be easily possible to control also other […]