
PIR (Pyroelectric InfraRed) sensors measure infrared (IR) light that is radiating from objects in the detection area. The HC-SR505 is such a sensor. It very easy-to-use as it already delivers a HIGH signal if something is moving in the detection area. This HIGH signal lasts about 8 seconds, which is sometimes seen as a disadvantage. Unfortunately, this disadvantage can not be solved on software level, i.e. adding a workaround to the source code does not work (I’m almost 100% sure that this can only be solved by replacing one of the capacitors or resistors). The module has an operating voltage between 4.5V and 20V. According to the data sheet, the sensor detects movement up to a distance of 3m. In this tutorial, it is shown how to use the HC-SR505 sensor with the Arduino Platform.
List of materials:
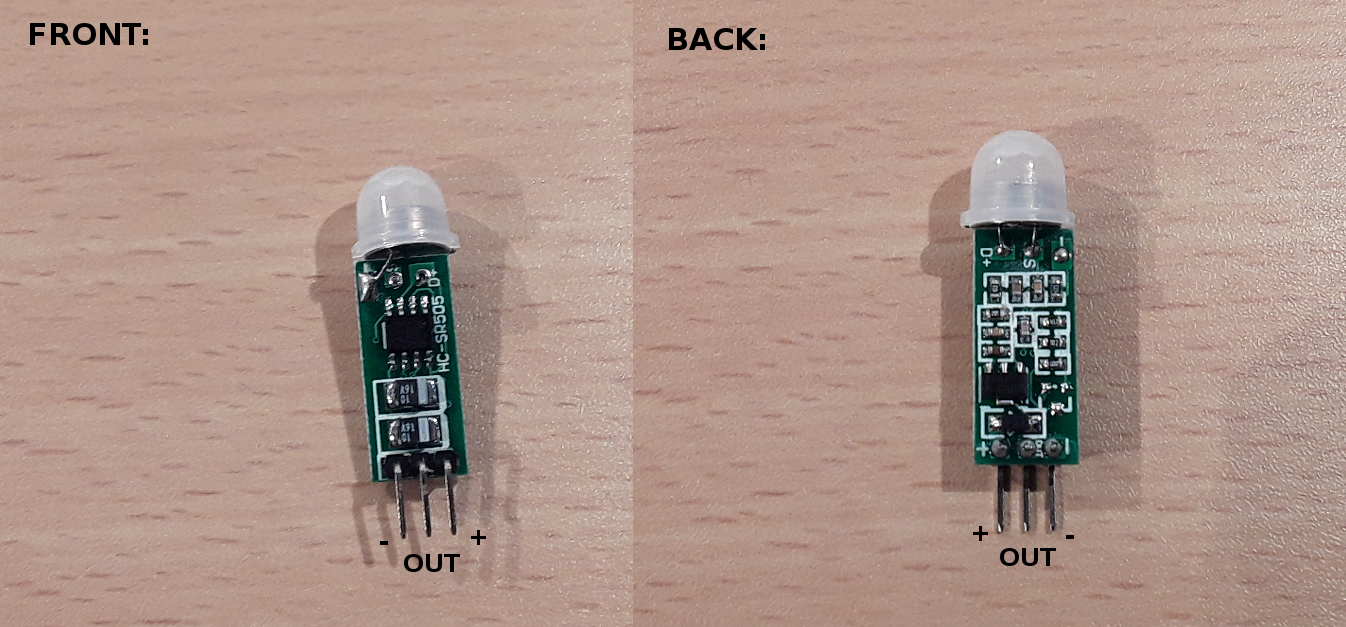
Pin layout
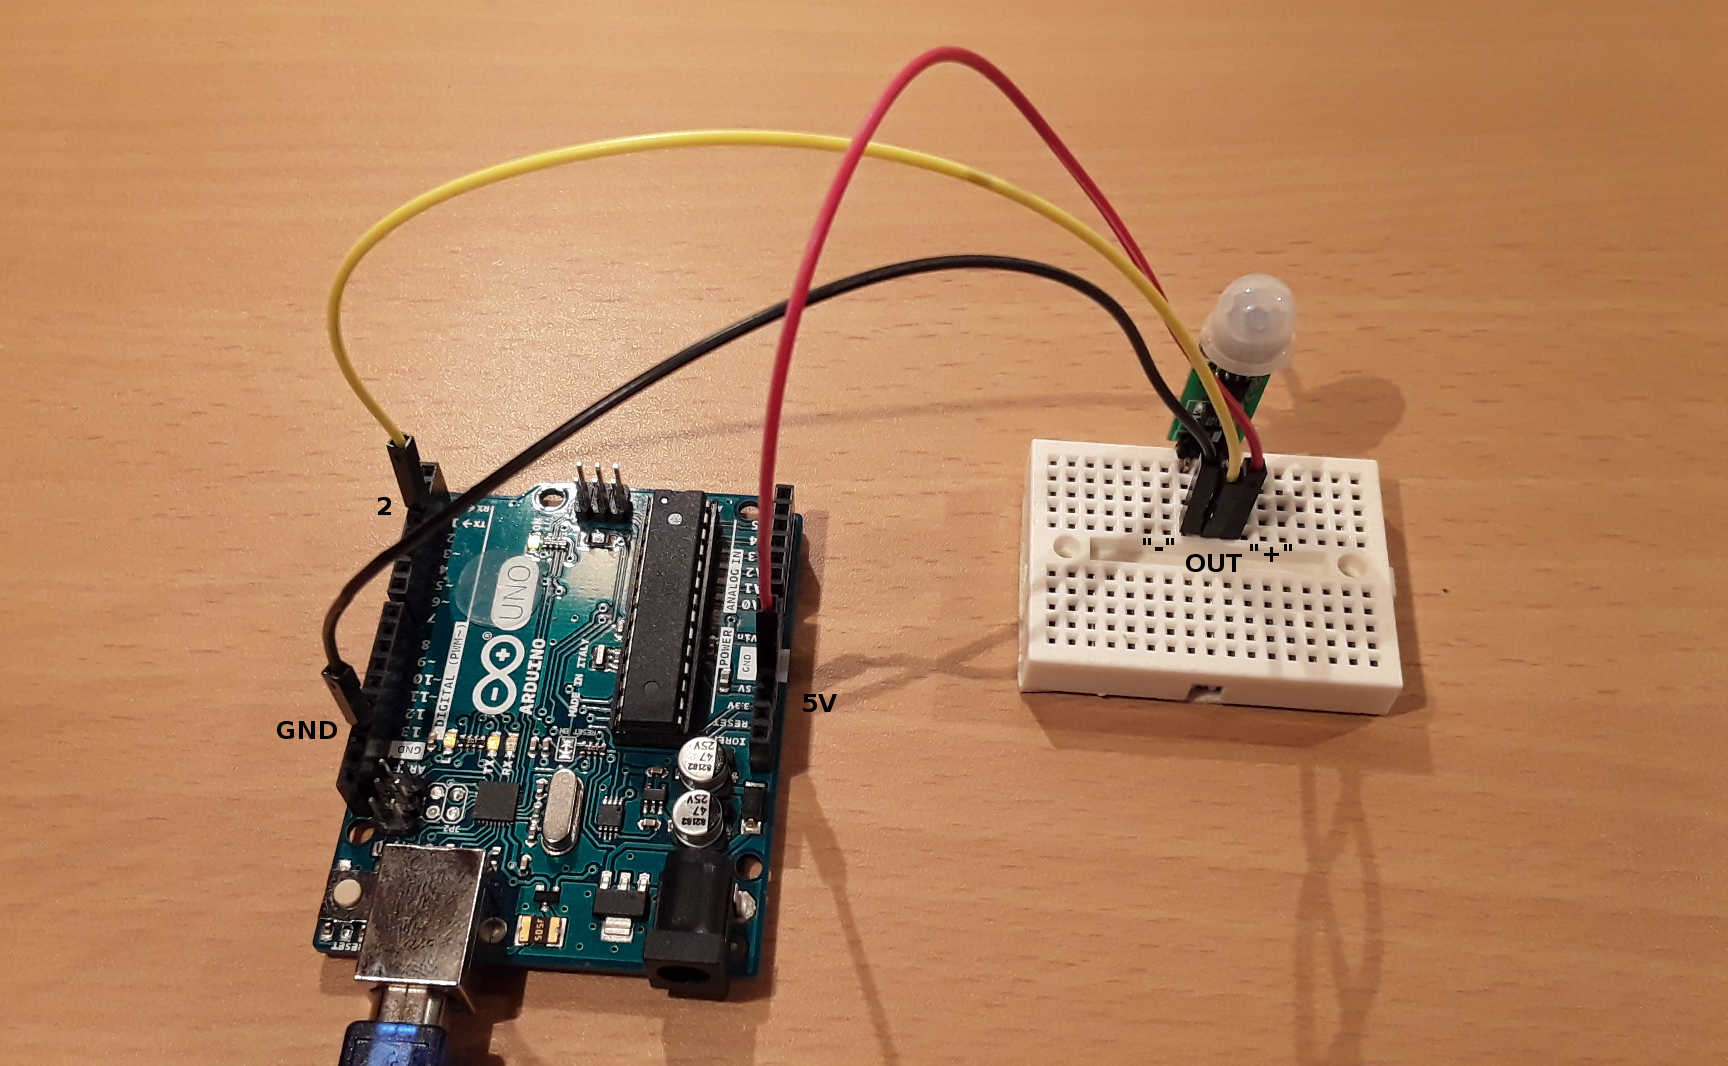
In order to wire the SR505 to the Arduino, you need only three wires. The SR505 has three pins which are marked on the back: “-“, “OUT”, and “+”. First, make sure that the SR505 is provided with enough voltage: One of the Arduino’s GND pins must be connected to the SR505’s “-” pin. Next, the Arduino’s 5V pin must be connected to the “+” pin of the SR505.
The remaining “OUT” pin returns either LOW or HIGH, depending on whether something was detected. This pin must be connected to one of the Arduino’s digital pins. In this tutorial, pin #2 is used.
Example source code
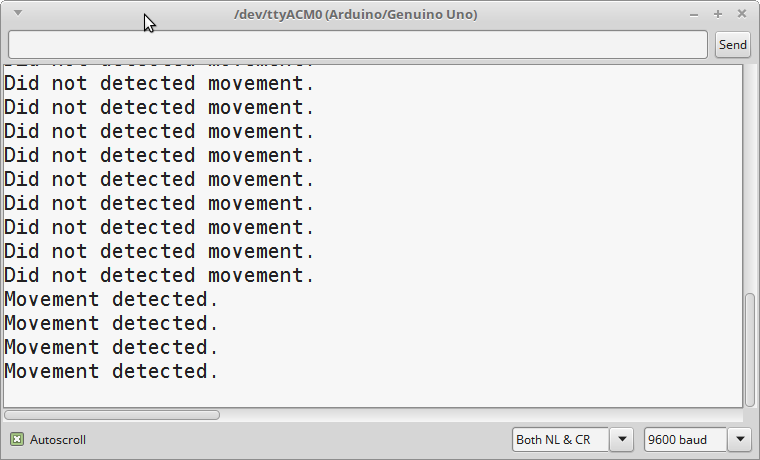
The program is very simple. First, a serial connection is opened in the setup function. The serial connection is used later to print the sensor’s state to the serial monitor. Then, pin #2 is declared as an input pin. In the loop function, the state of pin #2 is read. If the pin has a HIGH signal, the message “Movement detected.” is printed. Otherwise, if the pin has a LOW signal, a message is printed indicating that the sensor did not detect any movement. At the end of the loop function, a delay of a second is added to avoid flooding the serial monitor with too many messages.
// (c) Michael Schoeffler 2017, http://www.mschoeffler.de

#define SIGNAL_PIN 2

void setup()
{
  Serial.begin(9600);
  pinMode(SIGNAL_PIN, INPUT);
}

void loop() {
  if(digitalRead(SIGNAL_PIN)==HIGH) {
    Serial.println("Movement detected.");
  } else {
    Serial.println("Did not detect movement.");
  }
  delay(1000);
}
When the code has been compiled and transferred to the Arduino, the serial monitor (“Tools”-> “Serial monitor”) should show the current state of the PIR sensor. You can easily trigger the sensor to detect something by moving your hand above the sensor.
Video Tutorial
hello, i’ve tried your tutorial it keeps detecting movement even when there’s no movement what could be the problem?
in my serial monitor i get only ‘movement detected’
Thank you very much Michael for the thorough exercise/
i’ve tried your tutorial using Arduino mini pro and it keeps showing detecting movement even when there’s no movement.
even I out of room and it still showing movement. Why?
in my serial monitor i get only ‘movement detected’
Hello, could you help me? Is there any difference in the HI output for LOW, or other characteristics in the am312 and PIR sensors – HC-SR501
This PIR send signal for 8 seconds, some of them near 10 seconds. Its good then you want to tur on light for that short time.
thanks but please How can I control the operating time of this sensor?