
Recently, I had the idea to make a digital picture frame—one of these kinds which load images from SD cards and show each image for some time. I was remembering myself that I already own a small TFT display, the KMR-1.8 SPI, that works out of the box with an Arduino Uno. When I digged up my KMR-1.8 SPI, I realized that it has also an in-built SD card reader. Moreover, I looked up the Internet and found ready-to-use libraries for the in-built SD card reader as well as showing images on the TFT display. For these reasons, I thought making such an digital picture frame will turn out very easy.
When I started to implement my first lines of codes and started to connect my Arduino Uno to the KMR-1.8 SPI, I ran into two major problems. First, the colors of my image file did not match to the colors displayed by the KMR-1.8 (red and blue were interchanged). Second, my first prototypes stopped to work after about 5 minutes. The application started to freeze and showed the same image forever instead of displaying the next image after a chosen time.
I did some research on the Internet and I found out that many people ran into similar problems. The second problem seemed to be caused by some memory leaks in the code. Nevertheless, I did not came across any example code that worked out of the box for my setup. Therefore, I want to share how I made it work.
List of materials:
| Arduino Uno | |
| Jumper wires | |
| Breadboard | |
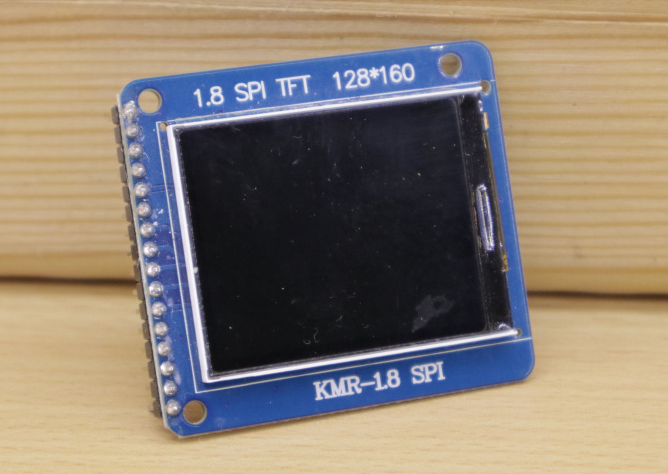
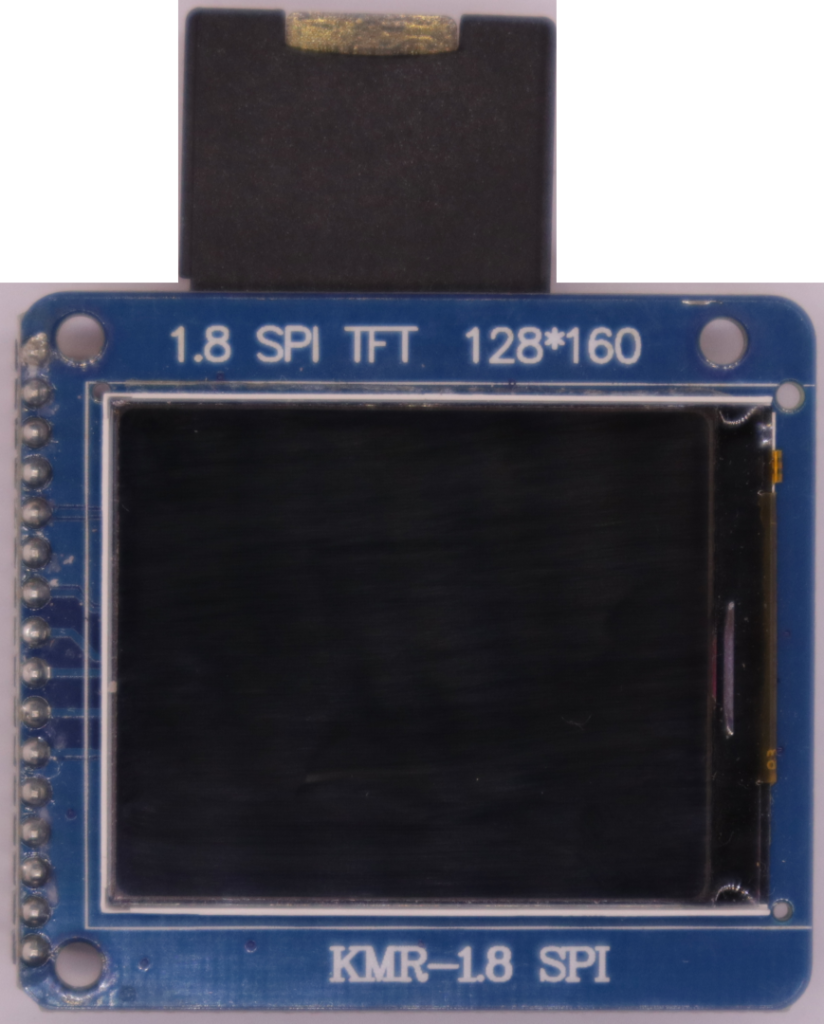
| KMR-1.8 SPI TFT display (width 160px, height 128px) | |
| SD Card Adapter |
Important note:
There exists various versions of so-called “1.8 TFT displays” from different manufacturers. Not all of them are 100% compatible to each other. Therefore, if you own a TFT display and want to use my tutorial to make it work, please check if your TFT display really matches the version I used in this tutorial:
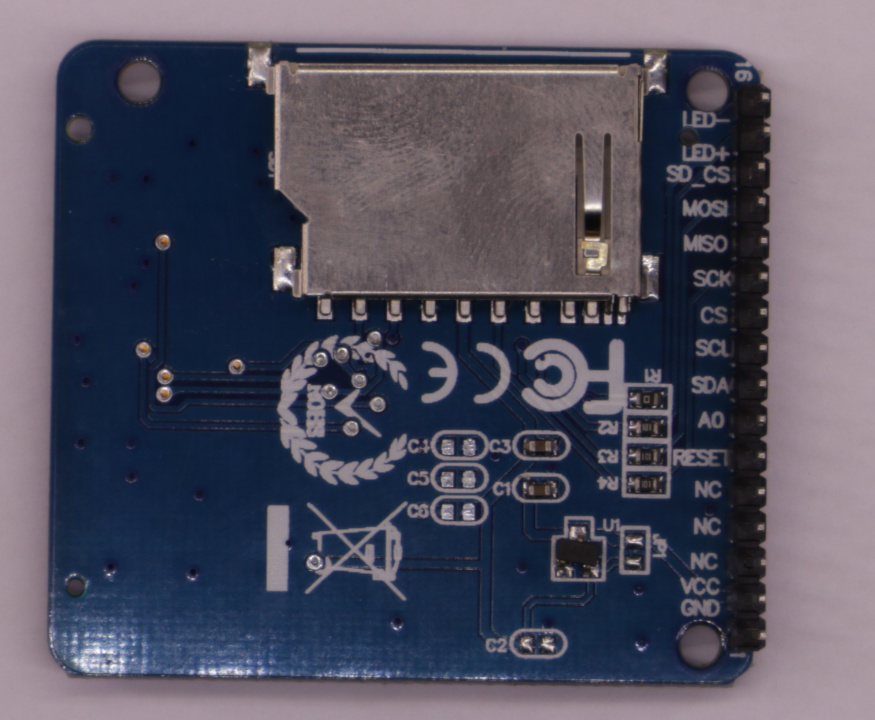
Wiring / Pin Layout:
To make it work, you have to connect many wires between the Arduino and the TFT display. I created a fritzing file that shows all the wiring:
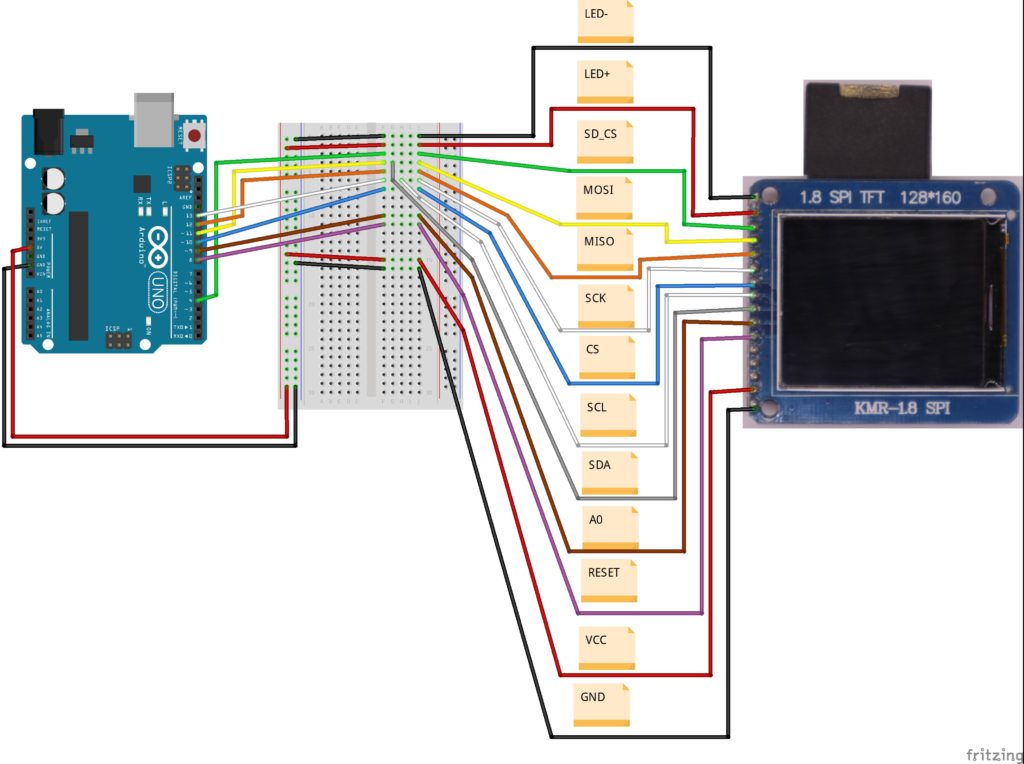
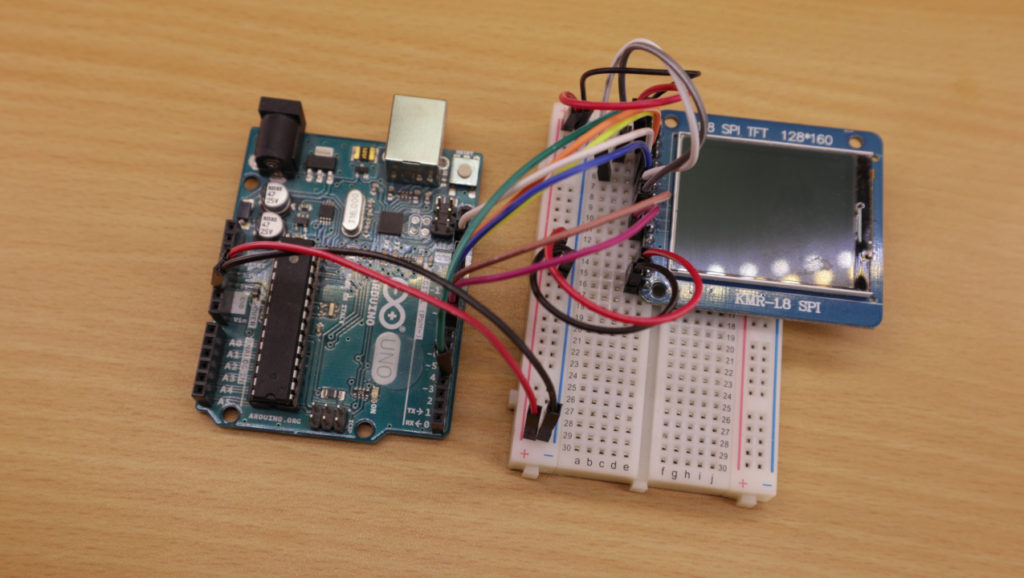
The wiring is more or less straight forward. Keep in mind that the Arduino’s 5V pin goes to the VCC pin as well as to the LED+ pin. The same applies to the Arduino’s GND pin which goes to GND and LED- of the TFT display. Arduino’s digital pin #13 goes also to two pins (SCK and SCL). Next, there is a picture of my setup with completed wiring:
Source code:
The source code relies on three header files (and libraries): SPI.h (Link), SD.h (Link) and TFT.h (Link). Please make sure that all of them are correctly installed before trying out my source code (In Arduino IDE: Tools -> Manage Libraries…).
In the introduction of this blog post, I mentioned that I came across two major problems: the colors red and blue were interchanged and my early Arduino programs started to freeze after some time. Luckily, I was able to fix all issues. The following source code works perfect on my setup. My “digital picture frame” does not require to be restarted after some time (my long-term test lasted about two weeks—and no restart was necessary).
I overcame the first problem by not using the default initialization method (“TFTscreen.begin();”) of the TFT library. Instead, I looked up whats inside the “begin”-method. I found a method called “initR” which has a parameter that allows to perform the initialization for a specific chip. Here, the parameter value “INITR_BLACKTAB” worked for me as the colors were then shown correctly. In addition, I call the method “setRotation” with parameter value “1” in order to be conform to the default initialization method. In the end, the code for the setting up the TFT library object looks like this:
// ...
TFTscreen.initR(INITR_BLACKTAB);
TFTscreen.setRotation(1);
// ...
I solved the second problem (application freezes after some time) by avoiding any possible memory leak, i.e. to “free” every bit of memory that was reserved before as soon as it is not needed anymore. Therefore, you will find a lot of “close”-method calls as well as some weird string handling. When I wrote the code, I thought I could simplify a few things. However, the memory leak problems came back. So, the code might look weird but it works :)
Here is the full source code:
// (c) Michael Schoeffler 2019, http://www.mschoeffler.de

#include <SPI.h>
#include <SD.h>
#include <TFT.h>

#define PIN_SD_CS 4
#define PIN_TFT_CS 10
#define PIN_DC 9
#define PIN_RST 8

#define DELAY_IMAGE_SWAP 60000 // each image is shown for 60 seconds

TFT TFTscreen = TFT(PIN_TFT_CS, PIN_DC, PIN_RST);

void setup() {
  // initialize default serial connection to send debug information
  Serial.begin(9600);
  while (!Serial) {
    // wait until default serial connection is fully set up
  }

  //The following two lines replace "TFTscreen.begin();" => avoids that red and blue (?) are swapped/interchanged
  TFTscreen.initR(INITR_BLACKTAB);
  TFTscreen.setRotation(1);


  TFTscreen.background(255, 255, 255); // prints black screen to TFT display

  init_SD(); // function call that initializes SD card
}

void init_SD() {
  // try to init SD card
  Serial.print(F("SD card init..."));
  if (!SD.begin(PIN_SD_CS)) {
    Serial.println(F("ERROR")); // failed
    return;
  }
  Serial.println(F("SUCCESS")); // ok
}

void loop() {
  File dir = SD.open("/"); // open root path on SD card
  File entry;
  char name[16];
  bool worked_once = false;

  while (entry = dir.openNextFile()) { // iteratively opens all files on SD card.
    Serial.print(F("Opened File: "));
    Serial.println(entry.name());
    strcpy(name, entry.name()); // file name is copied to variable "name"
    entry.close(); // After copying the name, we do not need the entry anymore and, therefore, close it.
    int filename_len = strlen(name);
    if ((filename_len >= 4 && strcmp(name + filename_len - 4, ".BMP") == 0)) { // check if the current filename ends with ".BMP". If so, we might have an image.
      PImage image = TFTscreen.loadImage(name); // loads the file from the SD card
      if (image.isValid()) { // If the loaded image is valid, we can display it on the TFT.
        Serial.println(F("Image is valid... drawing image."));
        TFTscreen.image(image, 0, 0); // this function call displays the image on the TFT.
        worked_once = true; // we set this variable to true, in order to indicate that at least one image could be displayed
        delay(DELAY_IMAGE_SWAP);
      } else {
        Serial.println(F("Image is not valid... image is not drawn."));
      }
      image.close(); // image is closed as we do not need it anymore.
    } else {
      Serial.println(F("Filename does not end with BMP!"));
    }
  }
  dir.close(); // directory is closed


  if (worked_once == false) { // if not a single image could be shown, we reconnect to the SD card reader.
    Serial.println(F("Warning: Printing an image did not work once! Trying to reinitalize SD card reader."));
    SD.end();
    init_SD();
  }

}
The code looks for image files (*.BMP) on the SD card and shows each image for 60 seconds. You can change the display time by setting “DELAY_IMAGE_SWAP” to a new value.
Important Note: The image files on the SD card must be stored as BMP with a resolution of 160×128 pixels (width x height). Moreover, long file names and special characters must be avoided.
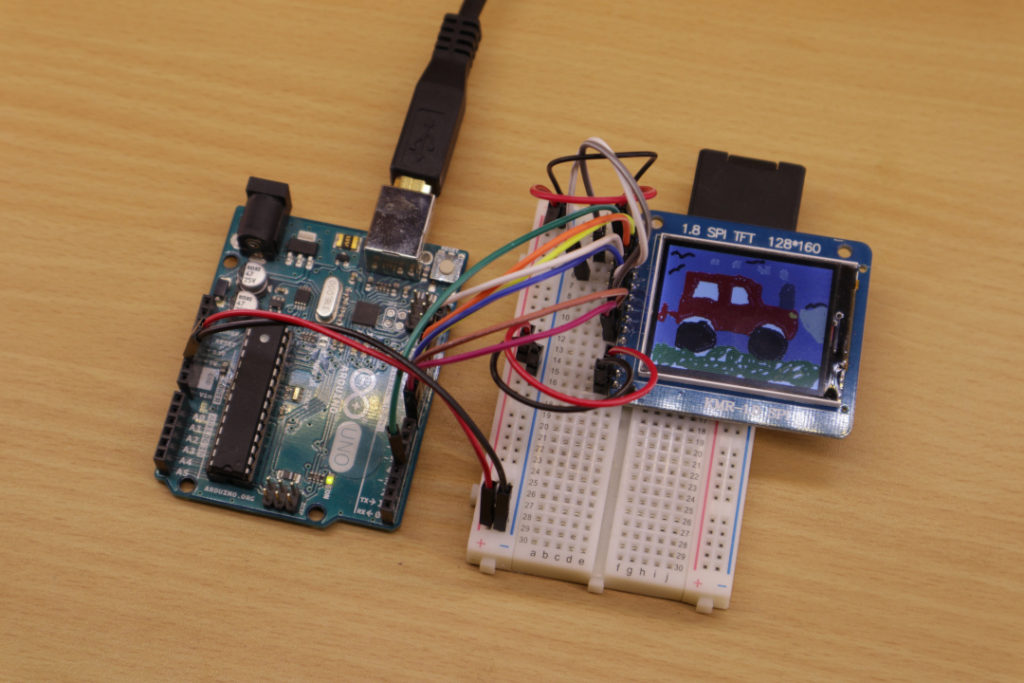
If everything was done correctly, your Arduino-based “digital picture frame” should show the pictures in all their glory. Here is an example picture (tractor-like vehicle that I drew together with my son):
Video tutorial:
[…] directly wired to an Arduino. If you look up my tutorials you can find many of them: For example, KMR-1.8 SPI (TFT Display), RDM630/RDM6300 (RFID Reader), GY-521/MPU-6050 […]
hi, i am fighting wthi ardiono ONE not original, and KMR-1.8, but i didn’t have, does not nothing, when i insert de SD, the led RX(arduino one) flashing.
i wired like you say, thanks for your help
[…] that simply. So far, I made many tutorials in which a display is used, e.g. the tutorial about the KMR 1.8 display. I receive a lot of messages from readers that my code does not work with their setup. Typically, […]
I would like to use this TFT-screen together with an OV7670-cvamera. Do you or does anybody know how to combine this screen and camera together?
Thanks Michael
in some turrioal resistors of a k are inserted, I see the colors well, maybe a little too light
it will be because the resistors are missing