
An Arduino (Uno) can be used to blink an LED. In this tutorial, an LED is controlled which changes its light status every 1000ms.
List of materials:
LEDs have a forward voltage [V] and a forward current [mA]. Typically, the numbers of these two values can be found in the spec of the LED type. The LED used in this tutorial has a forward voltage of 2.2V and a forward current of 30mA. As the Arduino delivers 5V, 2.8V (5V-2.2V) have to be absorbed by a resistor. According to Ohm’s Law R=V/I, a resistor with 93.3 ohms (2.8V/0.03A) is needed. Since one typically does not have an resistor with exactly 93.3 ohms, the next “higher” one is used. Therefore, a 150 ohms resistor is used in this tutorial. If the forward voltage/current is not known, the use of a 1k ohms resistor is safe in most cases.
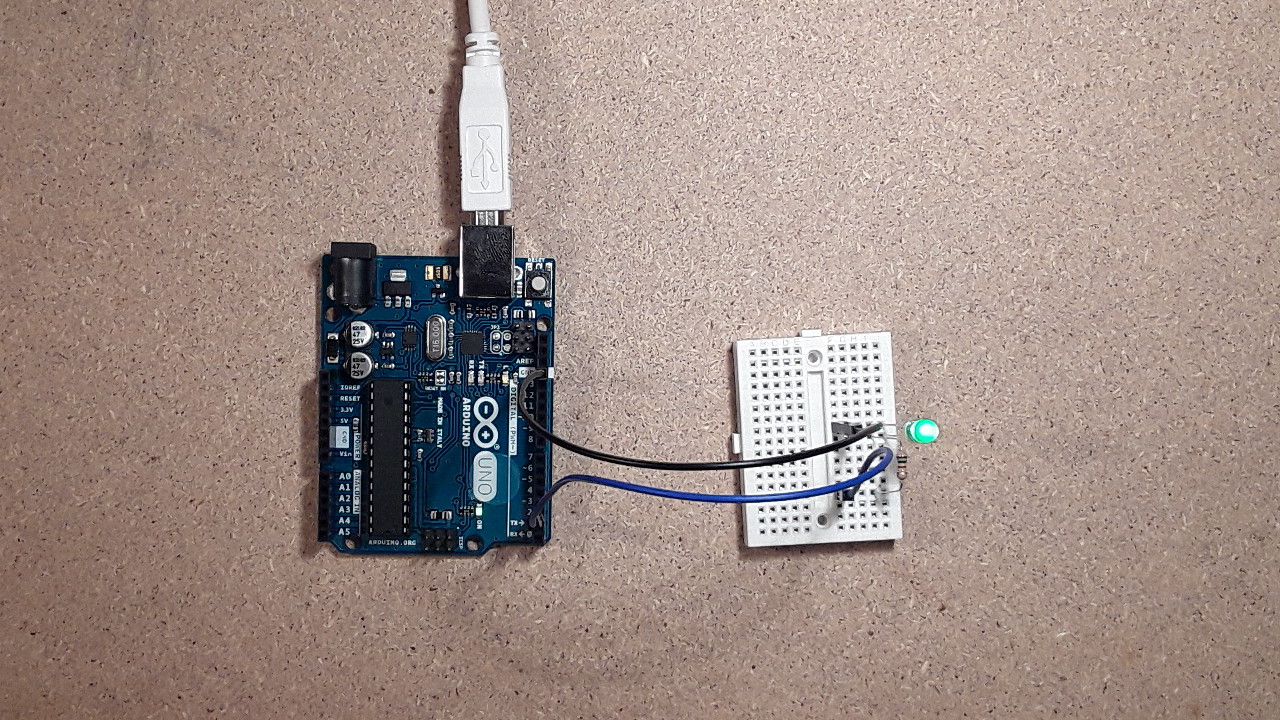
How to connect the LED to the Arduino?
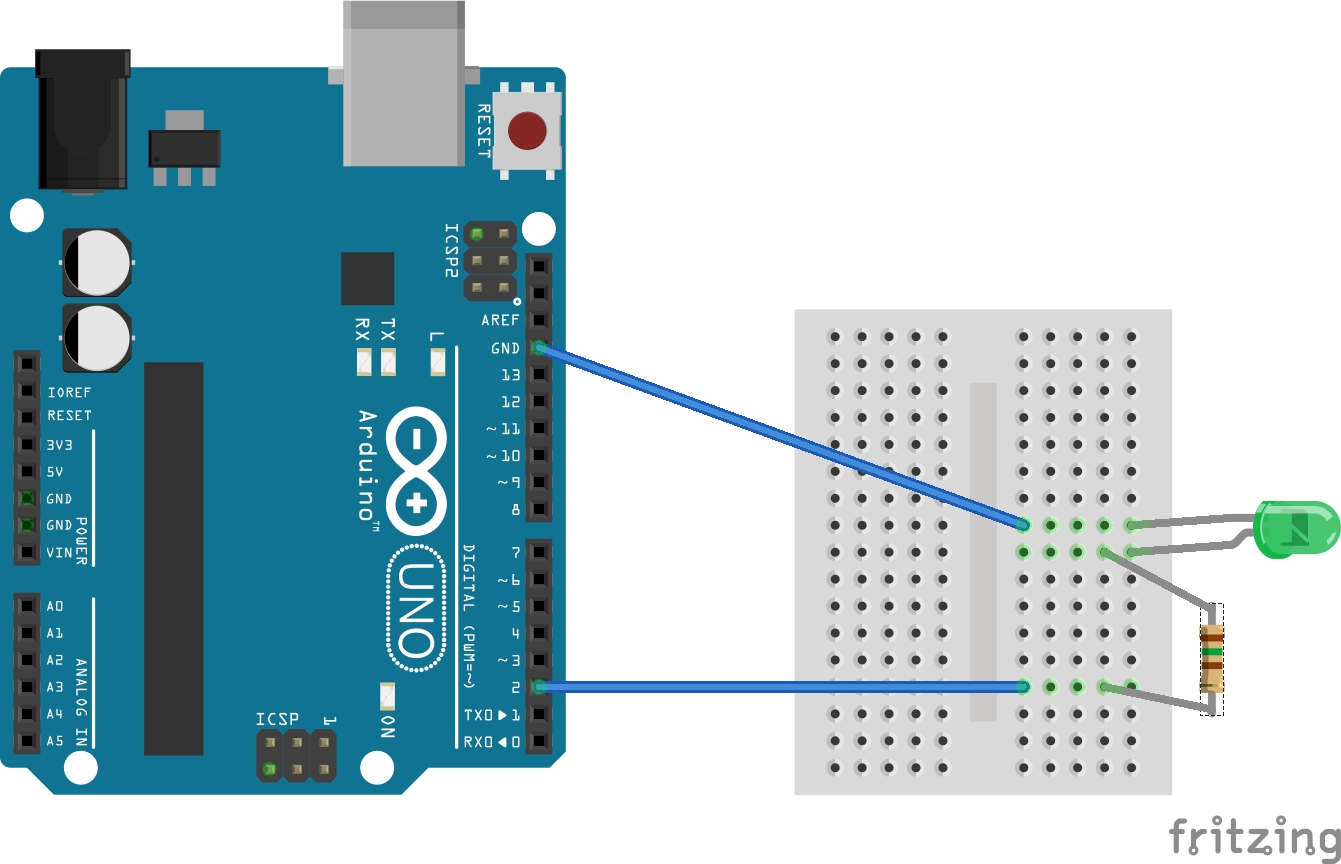
The Arduino’s GND pin is connected to the LED’s cathode (usually the short leg). One of the resistor’s pins is connected to the LED’s anode (long leg). The other pin of the resistor is connected to the Arduino’s pin “2”. As current flows only in one direction through the LED, the LED can not be connected the other way around. Resistors can be connected the other way around. Moreover, it does not matter whether the resistor is wired between GND and LED’s cathode or between pin “2” and LED’s anode.
How to program a blinking LED?
First, a variable is defined which stores the information that the LED is controlled with pin “2” (outLED). In addition, another variable is needed, which represents the LED’s state. As the state will be toggled (on, off, on, off,…), the variable is named “toggle”. In the setup function, pin “2” is set to output mode. In the loop function, toggle is inverted by use of the “!”-operator. The “!” is very helpful to describe a blinking state in one line of code. Next, the state stored in “toggle” is written to pin “2”. Finally, a delay of 1000ms is added in order to be able to perceive the blinking effect.
// (c) Michael Schoeffler 2014, http://www.mschoeffler.de

const int outLED = 2; // output pin for LED
boolean toggle = LOW; // variable that is used to store the pin's state (switched on/switched off)

void setup() {
  pinMode(outLED, OUTPUT); // set the LED pin to output mode
}

void loop() {
  toggle = !toggle; // change the state of the LED. If the state represents LOW, then change state to a HIGH value (done by "!" operator) and the outher way around.
  digitalWrite(outLED, toggle); // write state variable to LED pin
  delay(1000); // wait for 1000ms in order to achieve a blinking LED effect
}
Video Tutorial
[…] LEDs (light-emitting diodes) are perfect when you need output components that you want to control with an Arduino. LEDs can only emit light if wired correctly: GND is connected to the cathode (short leg) and the 5V signal to the anode (long leg). Moreover, LEDs require a resistor. You can either use Ohm’s Law or stick with the 1k rule of thumb (“1k works always, except in 1 out of 1000 cases”). If you are interested in more details, I made a tutorial about how to let an LED blink with an Arduino Uno. […]
hello , i want to blinking led with 2hz 3hz 4hz 5hz 25hz 40hz with arduino uno but what is delay and calculation ?
david sadi
hello , i want to blinking led with 2hz 3hz 4hz 5hz 25hz 40hz with arduino uno but what is delay and calculation ?