The KY-023 (or KY-23) is an easy-to-use analog joysticks for the Arduino microcontroller. The joysticks features two dimensions (x and y axis) as well as a state that is set when the joystick is pressed. In this tutorial, it is shown how to connect the KY-023 joystick with the Arduino and how to use it.
List of materials:
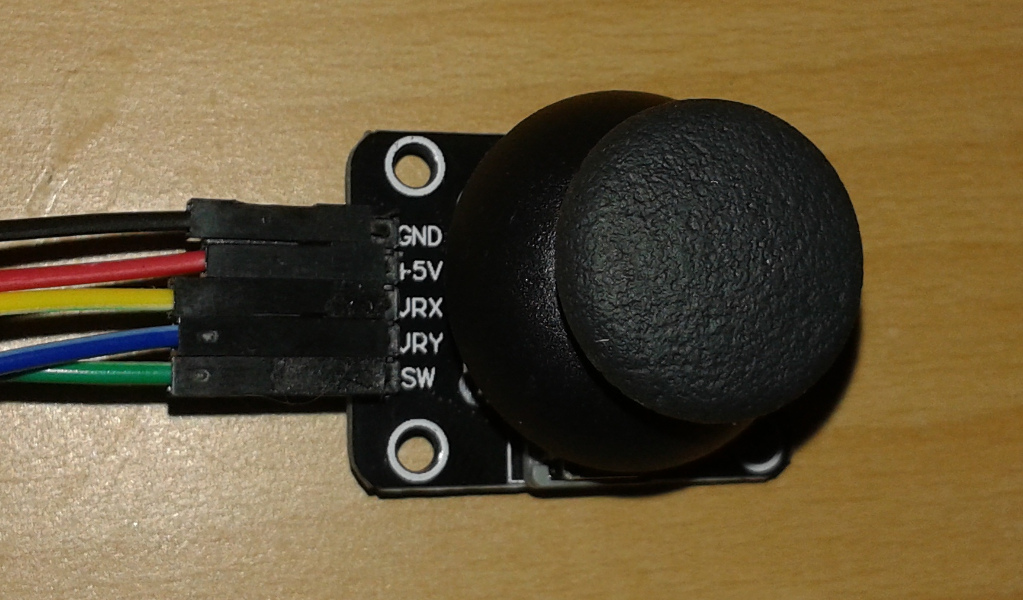
Typically, the KY-023 comes as a module with 5 male pins:
- GND (Ground Pin)
- +5V (5V Pin)
- VRX (voltage proportional to x-axis)
- VRY (voltage proportional to y-axis)
- SW (joystick pressed PIN)
How to connect the KY-023 to the Arduino?
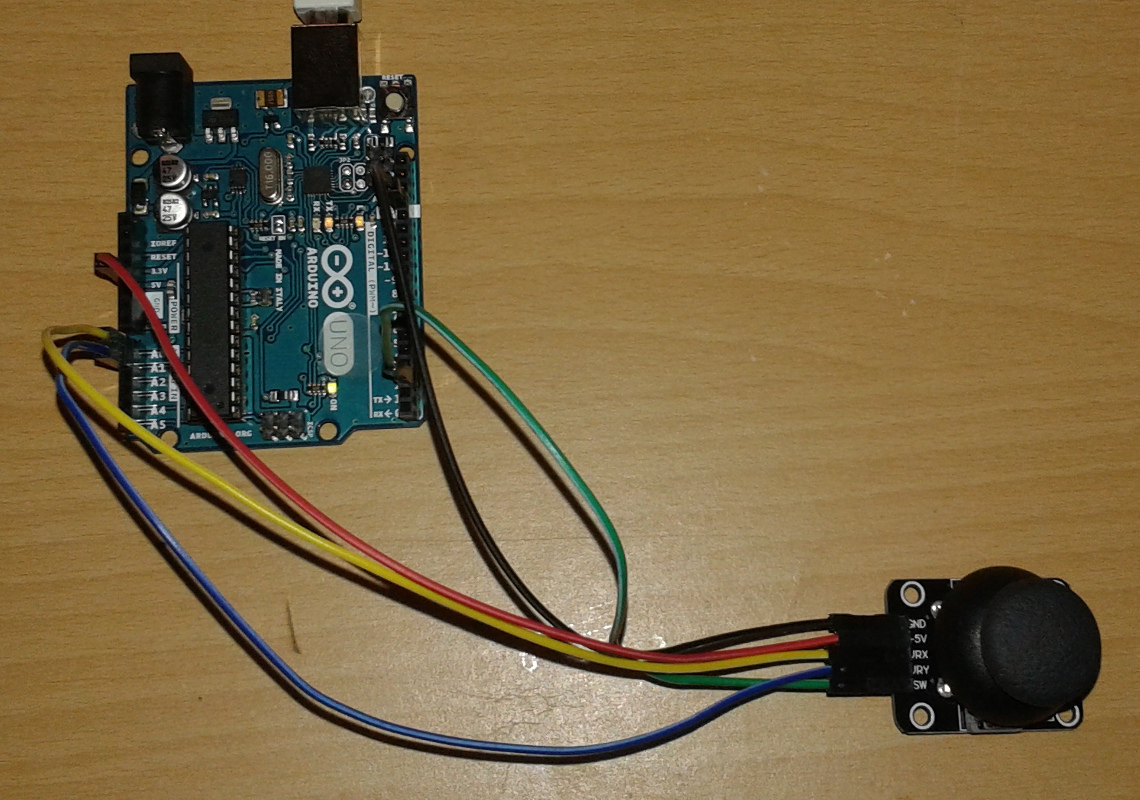
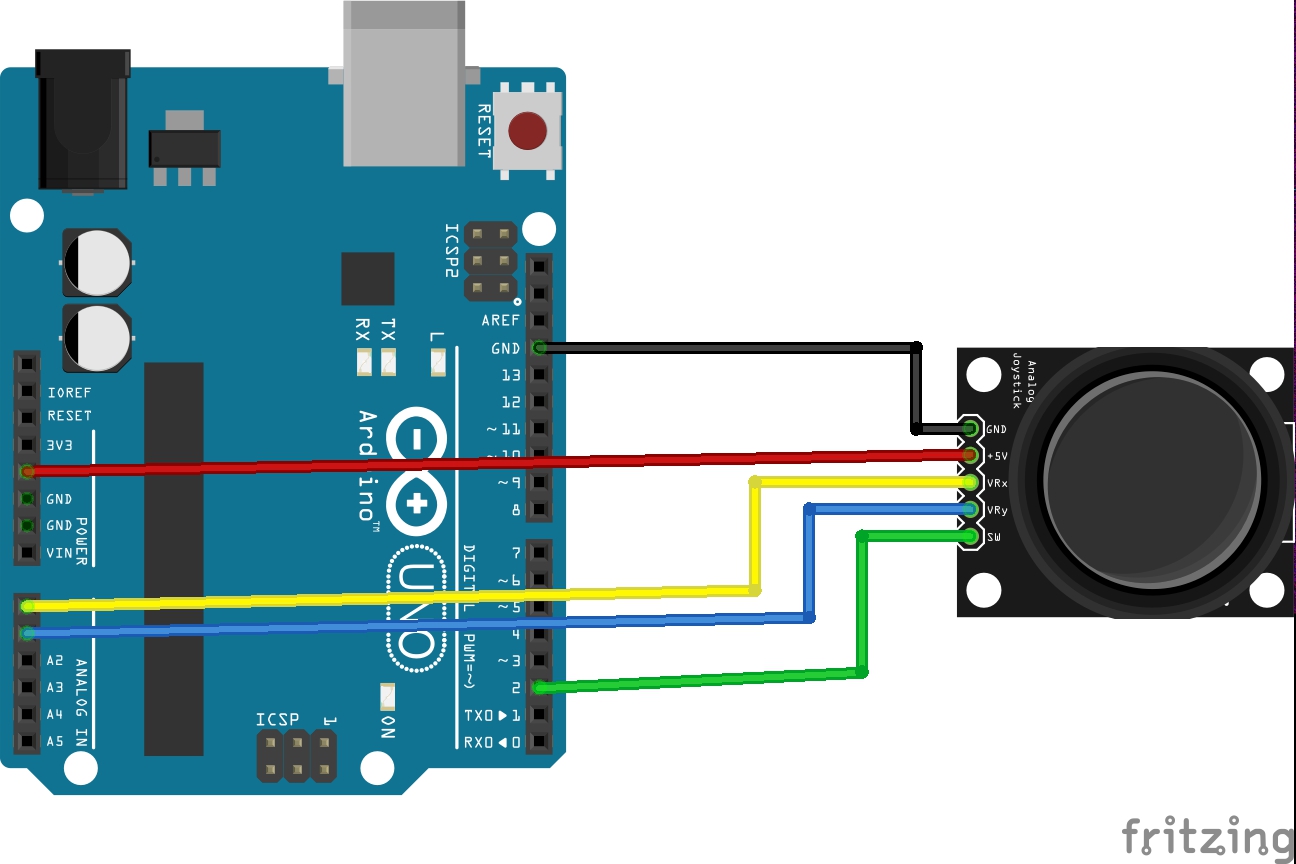
Connecting the KY-023 to the Arduino is very straight forward. The module’s “GND” has to be connected to the Arduino’s “GND”. As the KY-023 work also 5 Volt, the module’s “+5V” has to be connected to one of the Arduino’s “5V” pins.
The joystick is basically a combination of two potentiometers. This means, when the joystick is moved along the x-axis the resistance changes resulting also in a change of voltage. The voltage can be used to detect the x-position of the joystick by connecting the VRX Pin to an analog input of the Arduino. The same applies for the y-axis. The y-axis’ position can be read by connecting VRY to an analog input. In this tutorial, VRX is connected to “A0” and VRY is connected to “A1”. Lastly, SW is connected to the Arduino’s digital pin “2”.
How to program the KY-023 with the Arduino IDE?
The source code is fairly simple. First, we will setup the two analog pins A0 and A1 and the digital pin “2” to detect whether the joystick is pressed. Next, we setup the serial connection which is utilize to print out the current state of the analog joystick on the console.
Then, we read the analog data of the x- and y-axis. Thereby, the analog voltage of the potentiometers is mapped to a digital value between 0 and 1023. If the button is set up as shown in the upper picture/scheme, then moving the joystick to the left will result in an x value of 0. If the button is moved to the right, the x value will be 1023. If the joystick is moved to the top/north, then the y value will be 0. If the joystick is moved down, the y value will be 1023.
The pin mode of the button (for detecting whether the joystick is pressed) uses a pull-up resistor. The result is that the value of the pin will be 0 if the button is pressed. Therefore, the variable name “notPressed” is used in the source code.
// (c) Michael Schoeffler 2014, http://www.mschoeffler.de

const int inX = A0; // analog input for x-axis
const int inY = A1; // analog input for y-axis
const int inPressed = 2; // input for detecting whether the joystick/button is pressed

int xValue = 0; // variable to store x value
int yValue = 0; // variable to store y value
int notPressed = 0; // variable to store the button's state => 1 if not pressed

void setup() {
  pinMode(inX, INPUT); // setup x input
  pinMode(inY, INPUT); // setup y input
  pinMode(inPressed, INPUT_PULLUP); // we use a pullup-resistor for the button functionality

  Serial.begin(9600); // Setup serial connection for print out to console
}

void loop() {
  xValue = analogRead(inX); // reading x value [range 0 -> 1023]
  yValue = analogRead(inY); // reading y value [range 0 -> 1023]
  notPressed = digitalRead(inPressed); // reading button state: 1 = not pressed, 0 = pressed

  // print out values
  Serial.print("X: ");
  Serial.println(xValue);
  Serial.print("Y: ");
  Serial.println(yValue);
  Serial.print("Not pressed: ");
  Serial.println(notPressed);

  // The following delay of 1000ms is only for debugging reasons (it's easier to follow the values on the serial monitor)
  delay(1000); // Probably not needed for most applications
}
If the code has been successfully uploaded to the Arduino, the output on the Serial Monitor (Tools->Serial Monitor, Ctrl+Shift+M) should look like this:
Video Tutorial: